Cookiebot is a solution that helps you manage user consent and cookies on your website. It allows you to comply with data protection regulations such as GDPR and CCPA, and to optimize your website performance and user experience.
Google Tag Manager (GTM), which lets you manage and deploy various tags and scripts on your website without modifying the code, can also integrate with Cookiebot to control how tags behave in response to user consent choices.
In this article, we will show you how to install and configure Cookiebot, using Google Tag Manager, in a few simple steps.
Step 1: Create a Cookiebot account and scan your website
The first step is to create a free account on Cookiebot and register your website domain. Cookiebot will scan your website and generate a cookie declaration with information about the cookies and trackers that it finds. You can customize the appearance and behavior of the cookie banner and declaration on the Cookiebot manager.
Step 2: Implement the cookie consent banner in GTM
The next step is to implement the cookie consent banner on your website. To do this, you need to add the Cookiebot CMP tag template from the Template Gallery in GTM. This is a custom tag that will load the Cookiebot script on your website and display the cookie banner to your visitors.
To add the Cookiebot CMP tag template, follow these steps:
- In the GTM container, click on “Templates” in the left menu.
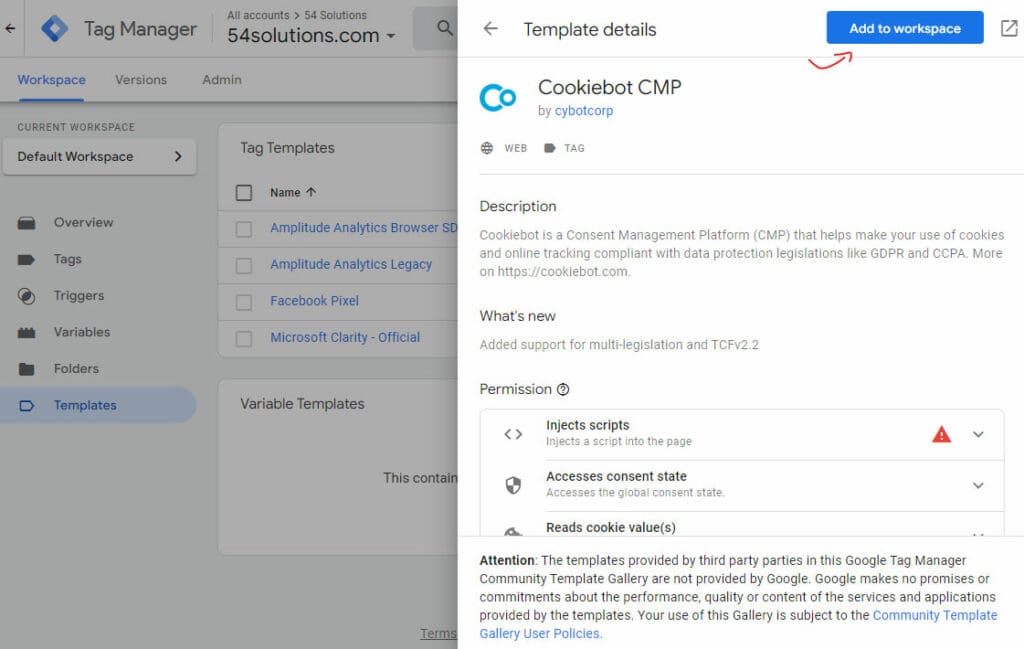
- In the “Tag Templates” panel, click the button “Search Gallery”.
- Type “Cookiebot” in the search box and select the template “Cookiebot CMP” from the results.
- Click “Add to workspace” and confirm by clicking “Add”:
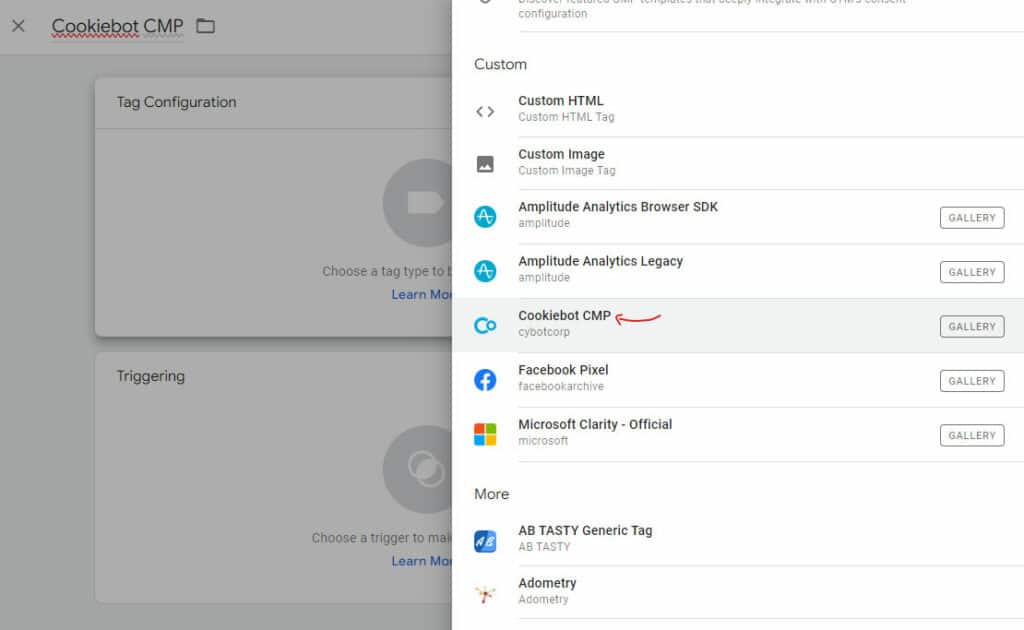
- Create a new tag by clicking on “Tags” in the left menu and then clicking on the button “New”.
- Click on “Tag Configuration” and select “Cookiebot CMP” from the list of custom tag types:
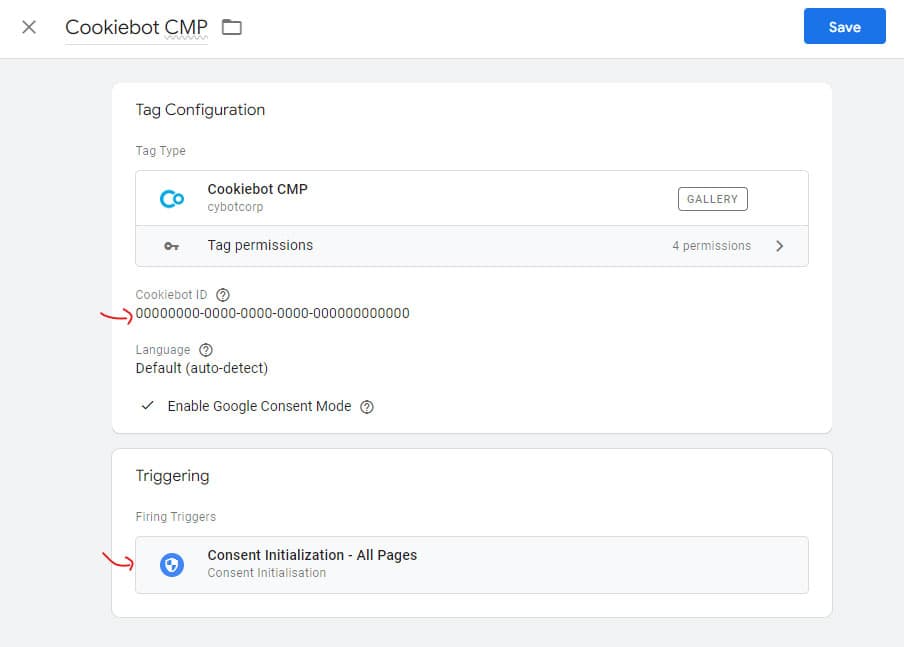
- In the “Cookiebot ID” field, copy and paste your Domain Group ID from the Cookiebot manager. This is a unique identifier for your website that looks like this: 00000000-0000-0000-0000-000000000000.
- Choose “Consent initialization – All pages” as trigger and apply a name to your tag, e.g. “Cookiebot”.
- Click “Save” to create the tag:
Step 3: Apply the Cookiebot tag to your own tags
The final step is to apply the Cookiebot tag that you created in step 2 to all your tags that use cookies or user data, such as Google Analytics, Google Ads, Google Optimize, etc.
To do this, follow these steps:
- In the GTM container, click on “Tags” in the left menu and select the Google tag that you want to apply the variable to.
- Click on “Tag Configuration” and scroll down to the “Advanced Settings” section.
- Expand the “Tag Sequencing” option and check the box “Fire a tag before … fires”.
- Click on “Choose a tag to fire before …” and select the “Cookiebot CMP” tag that you created in step 2:
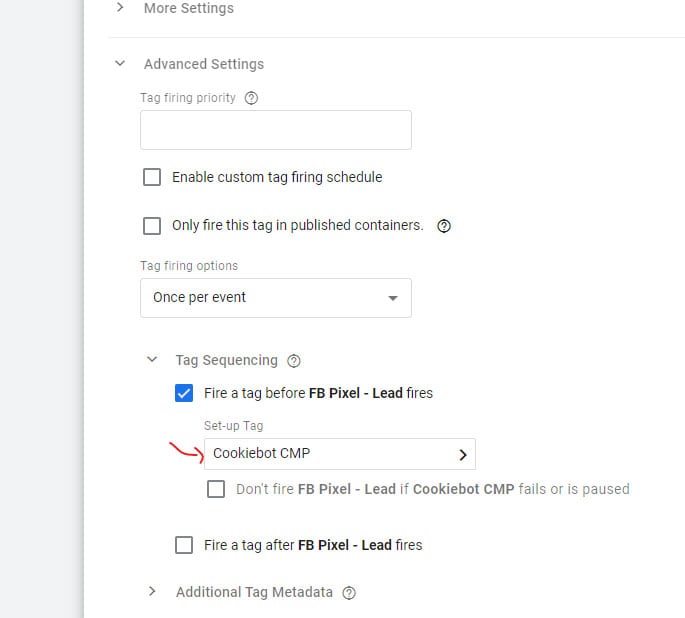
- Click “Save” to update the tag.
- Repeat this process for any other tags that you want to apply Cookiebot.
Conclusion
By following these steps, you have successfully installed and configured Cookiebot, using Google Tag Manager, on your website. You can now manage user consent and cookies in a compliant and efficient way, and optimize your website performance and user experience.